- Create Wiki Page
- All Pages

Circles and Spheres in Minecraft
When building your world, sometimes you run into the struggle that Minecraft is a pixelated game. There is no way of having a true curve in Minecraft, but there are ways to create circles.
- Any block that you choose
To make circles in Minecraft, draw a large “+” sign, then extend the 4 corners to form edges. The edges will be joined together in an irregular fashion, such that it is neither completely diagonal nor completely square to mimic the curved edge of a circle. After the outline, simply fill the shape with the block you wish. As for the sphere, you will have to build several circles atop each other, starting and ending with smaller ones, which gradually enlarge towards the center.
Here is the step-by-step pictorial guide you need to follow to Make Circles and Spheres in Minecraft:
Making a circle in Minecraft sounds difficult, but with this simple chart, it becomes very easy.

This chart explains how circles are made in a pixelated world. The numbers above each circle describe its circumference. For instance, if you want to build a circle that is 17 blocks wide, it will be 17 blocks from one way to the other. We are going to be using the 17 blocks wide circle for this example.
Step 1) The first thing you want to do is to place down 17 blocks. Count these blocks out and place another block perpendicular on both sides of the middle block (in this case it will be on the 9th block).

Step 2) After you do this, you want to go 7 blocks out on each side.

Step 3) Now you want to start at each tip. Each tip will act as the center of the edge of the circle. Each outermost edge of the circle needs to be 5 blocks long.

Step 4) Now that you have done this, you want to finish the outline of the circle. To do this, you are going to want to build out each corner with two blocks facing the same way the original edge is facing.
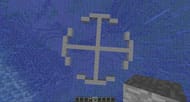
Step 5) After you complete these, you want to add the corners of the circle. To do this, do a miniature “L” with three blocks to fill in the gap in the outline that you just constructed.

Step 6) Now you have completed the outline of the circle. Now you can do whatever you want with your circle. You can either break the middle blocks and keep the circle hollow or you can fill it in and make it into a platform to stand on.
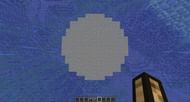
Making a sphere in Minecraft is just as easy as making a circle, except for the fact that it is three-dimensional instead of two-dimensional. Here is the chart that we are going to follow.
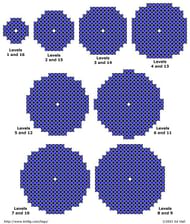
This chart looks difficult to follow but it is actually pretty straightforward. The first thing you want to do is to make a column that is 16 blocks tall. This is because the sphere is going to take up 16 blocks of space on all sides.
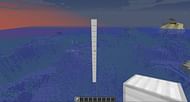
Step 1) Now that you have created your 16 blocks tall column, start with the top left of the diagram. The first part of the diagram states that levels 1 and 16 are the same and are a 7 block wide sphere.

Step 2) Now that you have created your two 7 blocks wide circles on the top and bottom of your column, all you need to do is work your way in. The second part is to do levels 2 and 15. Levels 2 and 15 are 11 blocks wide.

Step 3) Keep working your way down. Levels 3 and 14 are 13 blocks wide. Levels 4 and 13 are 15 blocks wide. Levels 5 and 12 are 17 blocks wide, and so on. As you can see, each new set of levels is just a sphere that is 2 blocks wider than the last. Continue this pattern until you meet in the middle. This should make your sphere.

A. Making a hollow sphere is easy. All you need to do is go inside of your sphere and mine out the inside. Make sure to keep the outlines and all of the outer edges.
A. Making a sphere is so much easier with WorldEdit. All you need to do is type in the following command:
//sphere [-r] <pattern> <radius>
//hsphere [-r] <pattern> <radius>
The first command line is for filled spheres and the second one is for hollowed spheres. The [-r] represents the offset of the creation of the sphere from where you are standing. The <pattern> represents the type of block you want the sphere to be made of. And finally, the <radius> represents how big the sphere is going to be.
Making a sphere is going to be really helpful in Minecraft. Spheres are a great way to show that you know what you’re doing when building in your Minecraft world. It also helps when you want to make curves in your world, like if you are building a turn in a rode. Make sure you practice making spheres if you want to truly get better at building in Minecraft.