- Create Wiki Page
- All Pages

In a Nutshell:
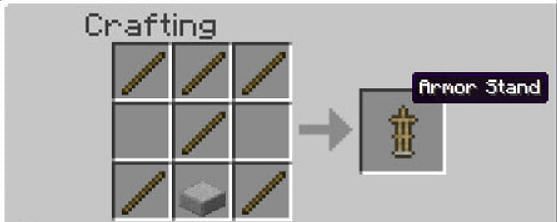
To make an armor stand, fill the first row of the grid that makes up the crafting table, with sticks. Place sticks on either side of the third row, and yet another stick in the center of the grid. To finish making the armor stand, place a smooth stone slab between the sticks on the third row. Now simply click the armor stand and drag it into your inventory
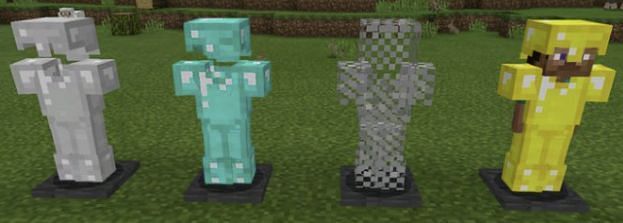
Armor stands were introduced in Minecraft Java edition officially in version 1.8, their intended usage was somewhat nichely to allow players to show off/ display their armor conveniently on a wooden stand.
It quickly became obvious however that the mechanics of armor stands could be used for several different purposes, particularly ones that suited the needs of 3rd party multiplayer Minecraft servers and map designers.
This short guide will cover all questions you might have concerning armor stands in their current state in the game. It will explain how to craft armor stands, some of their primary usages and finally some of the most common questions pertaining to the topic.
Armor stands require 5 sticks and 1 smooth stone slab to craft
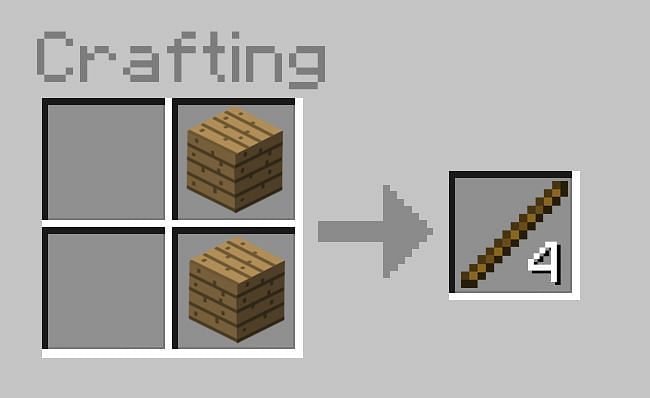
Sticks can be obtained easily via placing one wood plank on top of another in your 2x2 crafting inventory menu. If you are unsure as to how to get wood planks, click here.

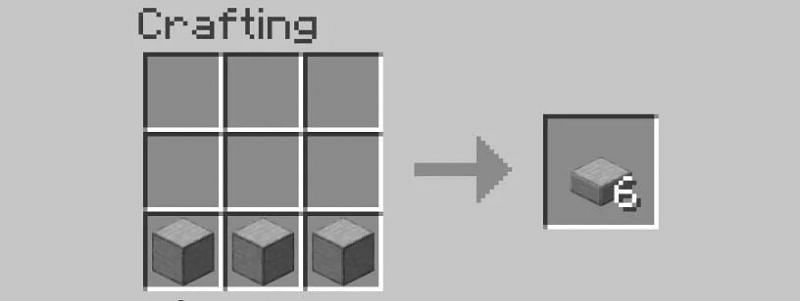
Smooth stone, which is needed to make smooth stone slabs can be obtained via mining any block of stone with a pickaxe enchanted with Silk Touch. This piece of stone then must then smelted inside a furnace.
If you are unsure how to smelt an item click here. If you are confused what the silk touch enchantment is or how to get it, click here.

After obtaining smooth stone, open a crafting table menu. Now simply arrange your smooth stone in the exact fashion shown below.
Also Read: How to make Banner in Minecraft
Here is the step-by-step pictorial guide you need to follow to make an armor in minecraft:
Step-1 To begin with, a crafting table menu must be opened. If you are unsure about the concept of a crafting table, or how to use/make one, check out this guide.


Step-2 Simply now replicate the exact layout below with your aforementioned smooth stone slabs and sticks needed for the recipe.
Step-3 That’s it! Now all you need to do is simply drag your newly crafted armor stand into your own inventory.
Armor stands can potentially serve you in several ways, depending on your individual requirements. In regular vanilla survival mode however, the main and most common use for them by far is simply to show off armor and allow for quick armor storage.
Outside of survival mode, armor stands can be used as great decorative devices to utilize during custom map creation. Many servers also choose to use armor stands frequently due to their unique mechanical properties; a myriad of the most popular server-side plugins in Minecraft currently rely on armor stands for correct functioning of their code.
Armor stands can be placed the exact same way as any other block in the game. There is nothing unique about placing armor stands contrasted to anything else.
Quickly punch the armor stand twice, and it should break. If that does not work, try destroying it with lava.
If nothing still seems to break it, stand next to the armor stand and type the command: /minecraft:kill @e[type=ArmorStand,r=2]
Simply hold the piece of armor you would like to give the armor stand to display and right click the stand.
Armor stands implement a niche but quality feature into the game, allowing you to show off some of your most valuable wares collected throughout your journey. The armor stand will always be a go to choice for any Minecrafter wanting to flaunt their riches in an epic display.
Perhaps somewhat more importantly however, the armor stand has also become an absolute staple in the world of Minecraft servers and custom maps, due to it’s sheer mechanical versatility.


